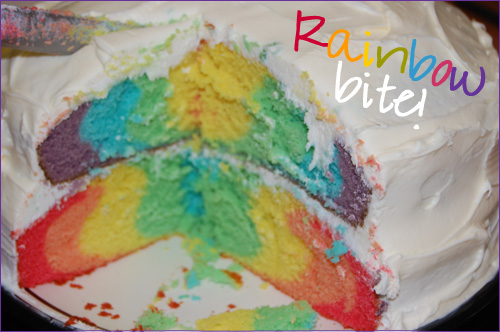
A few weeks ago I was blown away when I saw the rainbow cake posted on Hostess Blog. I knew right away that I had to try it for myself! I’ve been waiting for a good reason to bake a cake so when I found out it was a co-workers birthday, I decided to give it a go. The tutorial at Omnomicon was delightfully uncomplicated (and hilarious). The cake not only turned out great but it got rave reviews from all around City Hall and brought a big smile to a good friend and co-worker on her special day! Though Aleta’s tutorial is above adequate I still feel compelled to post my own version of the tutorial and answer some questions that I had as I was making this colorful confection.
First of all, I was a little hesitant to try the weight watchers recipe that Aleta uses on the tutorial. Since I wanted to be sure it tasted good I went ahead and used the recipe on the box. I know she has gotten a lot of questions about this so just let me quell any fears and tell you that it turns out the same no matter what recipe you use. I did notice that my batter looked a lot smoother and less glumpy (is that a word?!) than hers. Also, I wanted something richer than the white cake recommended, so I used French Vanilla. It didn’t affect the coloring at all and it tasted delicious.
My next hesitation was whether to double the recipe or not. I chose to take that advice and it worked out well but it was a LOT more cake than I bargained for. My boyfriend was running to Albertsons at 11:30 pm to get me more icing after discovering I was covered head to toe in powdered sugar in my failed attempt to make my own. (He wins the boyfriend of the year award for sure!) Lesson learned: be sure to get plenty of icing if you choose to double the recipe .
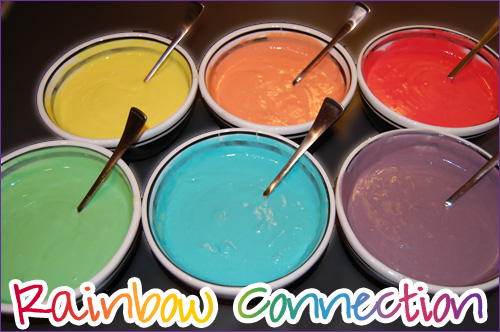
Once the cake batter was mixed I used a liquid measuring cup to divide the batter into six bowls with 1.5 cups of batter in each bowl. It measured out almost perfectly thanks to Aleta’s great calculations! I used Gel Food Coloring to make the different bowls different colors. I probably said ROY-G-BIV in my head about 50 times! I was a little disappointed that my colored batters weren’t as bright as the one in Aleta’s pictures but the final cake looked the same so it ended up being fine.
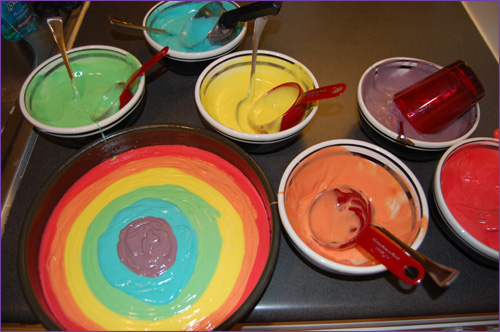
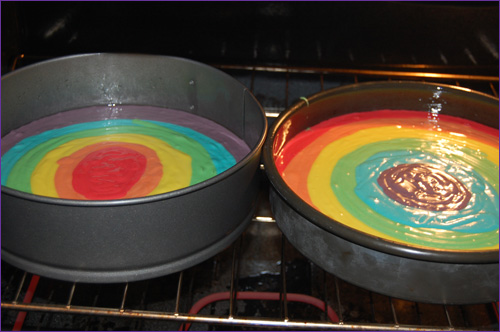
Though the tutorial does a good job of demonstrating how to layer the colors, it took me a while to figure out exactly how it was going to work. I was scared to actually start mixing the colors since I didn’t quite get how it was going to shape up. First I added about 2/3 of the red batter to the first pan. The neat thing that I didn’t expect was that it started to slowly spread out and fill up the entire pan. When I added the orange, it pushed the red out further, and so on and so on until I only had a little spot for the purple. By the time I started the second pan, I felt like an old pro!
To grease the pans I used Pam cooking spray. One of the cakes fell out easily but the other one was a little more tricky. Some of the top stuck to the pan but it was okay because I just made it the bottom layer of the cake. Another trick I learned from my mom is when making a layer cakes is to stick toothpicks in the bottom layer before placing the second layer on top. The combination of toothpicks plus the icing does a good job of anchoring the cake and keeping the top layer from sliding off.
Another thing I noticed was that even though I doubled the recipe the cakes cooked very quickly. I’d recommendkeeping an eye on them and using the lower end of the time on the box for your timer. The nice part of this cake is that any burnt areas on the surface will be covered with icing and the middle of the cake isn’t really affected. You can see more pictures on my flickr set where it looks like my cakes have little brown boils.
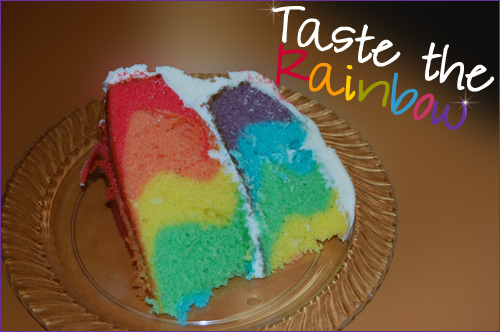
And ta-da! The cake turned out so well and everyone wanted to try it. I ended up being glad I doubled the recipe because everyone wanted a slice! I’ve sent Altea’s tutorial to five people already! I can’t wait to try out some other color combos for different occasions. It could be fun to do red and blue for the 4th of July or green and red for Christmas. The plain rainbow cake is versatile too and could be used for St. Patrick’s Day or even when talking about Moses and God’s covenant at Sunday School. Unfortunately Jenn, I won’t be doing purple and yellow for the Lakers (or LSU, ew!) but I’d definitely be up for a green and blue Mavs cake!
Baking this cake also had me thinking about all the fabulous rainbow quotes out there and so here are a few of my favs . You could use these to decorate for a rainbow themed party or use them on a birthday card to coordinate with the cake!
Rainbow Quotes
- “Somewhere over the rainbow, skies are blue, and the dreams that you dare to dream really do come true” – Lyman Frank Baum
- “Life is like a rainbow. You need both the sun and the rain to make its colors appear.”
- “May God give you…For every storm a rainbow, for every tear a smile, for every care a promise and a blessing in each trial. For every problem life sends, a faithful friend to share, for every sigh a sweet song and an answer for each prayer.” – Irish Blessing
- “Have faith in your dreams and someday your rainbow will come smiling through. No matter how your heart is grieving, if you keep believing, the dream that you wish will come true.”
- “Don’t miss all the beautiful colors of the rainbow looking for that pot of gold.”
- Someday we’ll find it, the rainbow connection. The lovers, the dreamers and me.”




Im going to try and make this cake this weekend!!! wondering how well its going to turn out its for my daughters 2nd birthday i will post pics. if i can find out how
I bought normal dye not realizing that you used neon dye. So I have sent my husband to the store to buy neon colors. Hopefully no one else will make my